Staging updates with Firebase Remote Config
Overview
In this guide, you will learn how to update your app in stages using the Firebase Remote Config component. With staged updates, you can control which users see the update based on their country, age, etc., or choose to show updates only to a percentage of your users chosen at random.
Staged updates are useful when introducing new features, especially for projects without a dedicated beta testing program. You will be able to gather useful feedback from your random testing group before your release is made available to all. Moreover, you will be able to roll back any "failed" updates without causing major issues.
Why Firebase Remote Config?
Firebase Remote Config lets you enable and disable features to specific users without having them update the app. These features can be both minor (like a new social login provider) and major (like a total redesign of your app). Remote Config is very similar to the OTA update system Android device manufacturers use to update your Android version.
You will be making a simple app with a tab layout. Using the Firebase Remote Config component, you will then show a bottom navigation instead of the tab layout to 20% of your users. You will also learn how to release the update to all users, and also to roll-back the changes.
Pre-requisites
Here are some things you should know before you can get started with this guide.
- Working with Firebase
- Working with the Tab Layout and Bottom Navigation components
Caution
This is guide covers advanced topics like Firebase, staged rollouts, and generic blocks. For sake of keeping this guide at a readable length, some basic instructions will be glossed over with the assumption that you are aware of the workings of other components. If not, please take a look at more basic guides before getting started here.
First steps
Head over to your Firebase Console to set up Remote Config for your Firebase project. If you do not have an existing project, create a new one.
Use the navigation menu on the left to go to the Remote Config section.
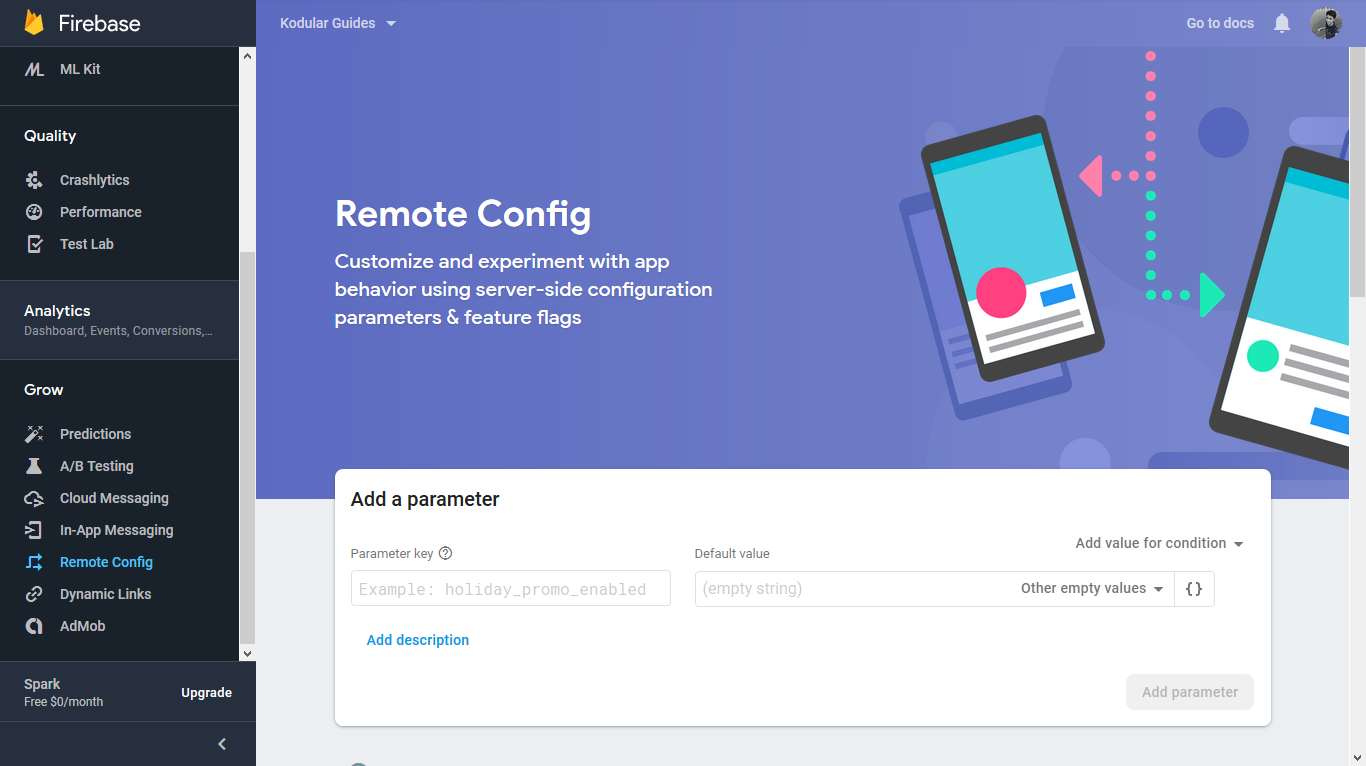
Firebase Remote Config works using parameters and values. Your will app will fetch the value of a parameter and then decide how to proceed. Firebase can send different values to different users, based on some conditions you can set. In this guide, we will create a parameter called bottom_nav_enabled, which returns false for all users except the 20% chosen at random.

Give the parameter a name
Next, add a condition to your parameter. Every conditon has a name, so that it can be identified easily when several are being used. We will name our condition random_testers_group. There are several constraints to choose from, but for this guide, we will restrict ourselves to "User in random percentile".
Add a condition
Tip
It is possible to chain several constraints in a single condition using the "and" button.
Your parameter can now have two values: one for those in the random_testers_group, and another for everybody else. Set the value to "true" for the testers, and "false" for others.
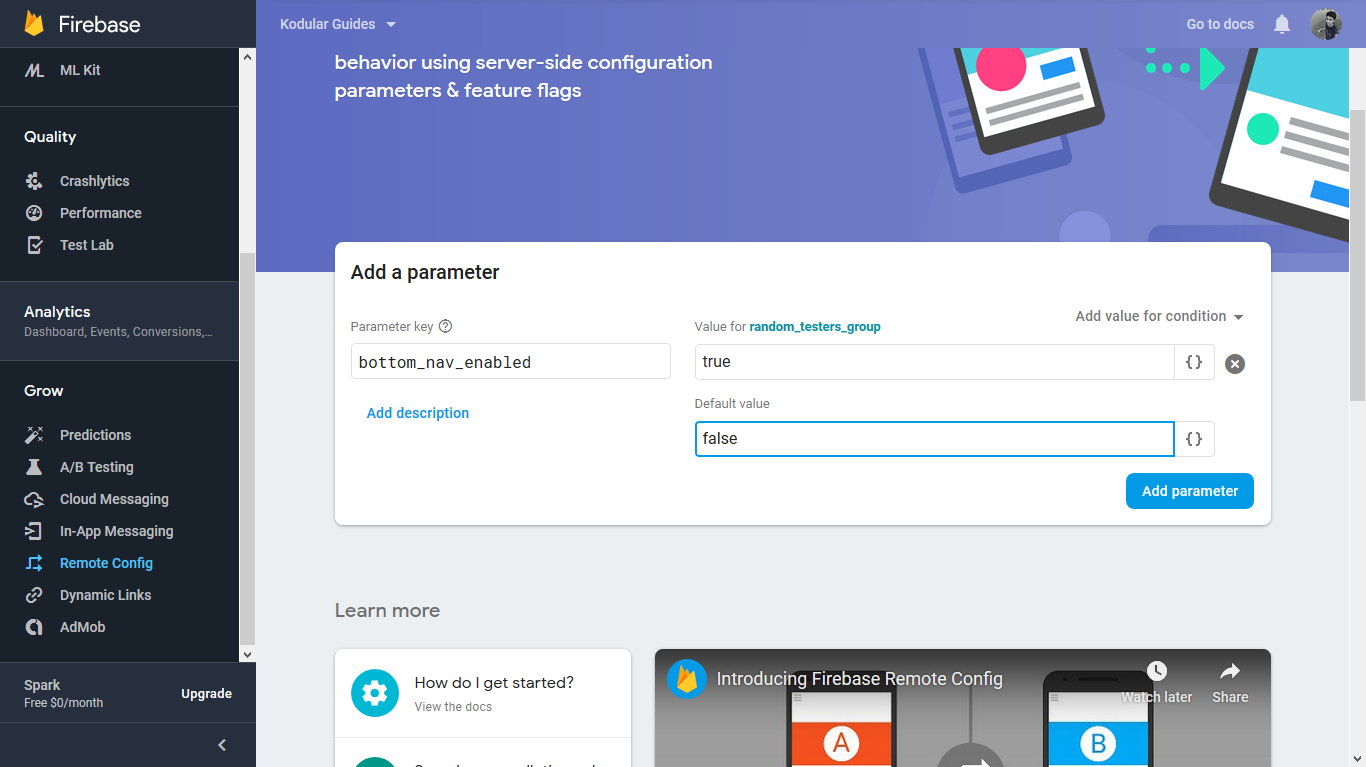
Add values to your parameter
Finally, click on "Add parameter", and then click "Publish changes".
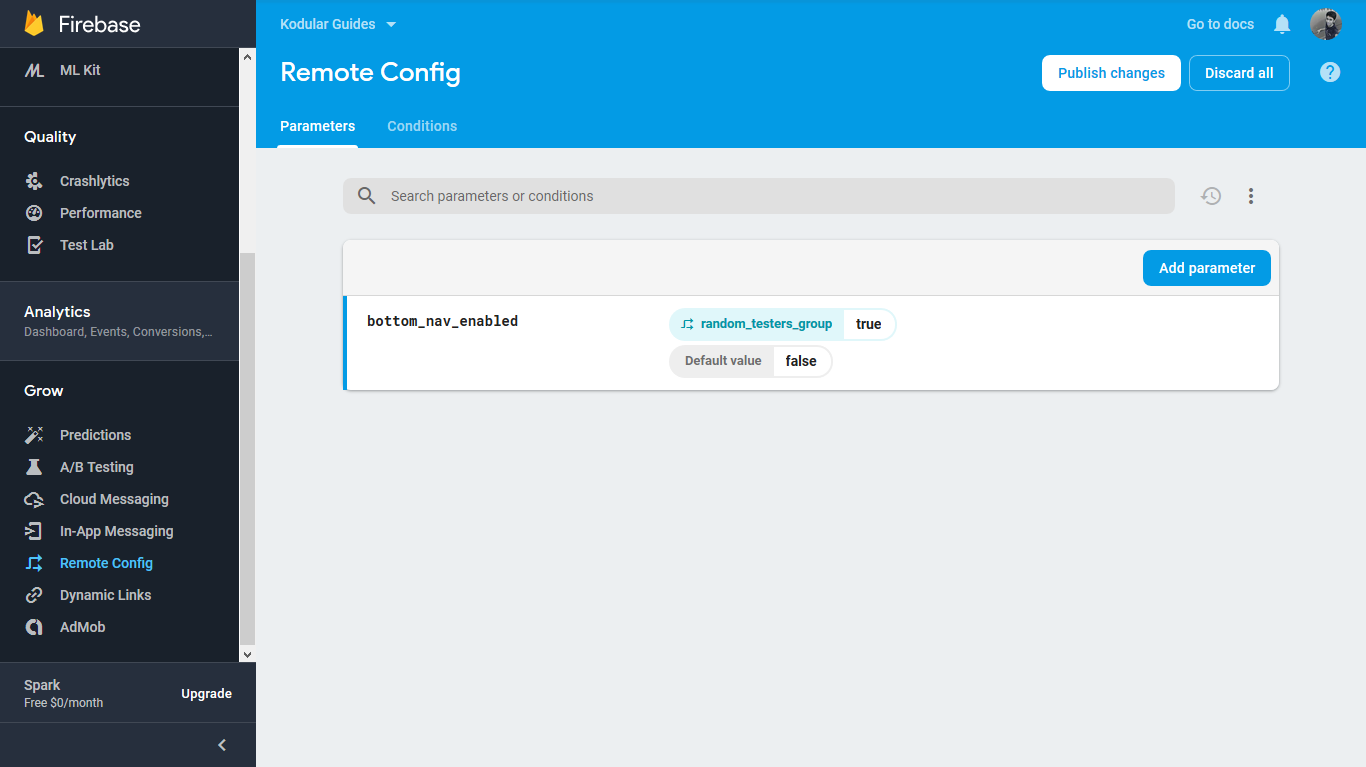
Publish your changes
Warning
Publishing your changes will make them live to all your users. Make sure you check everything twice before publishing!
That's it for the Firebase part. Now let's move to building your app.
Designing the app
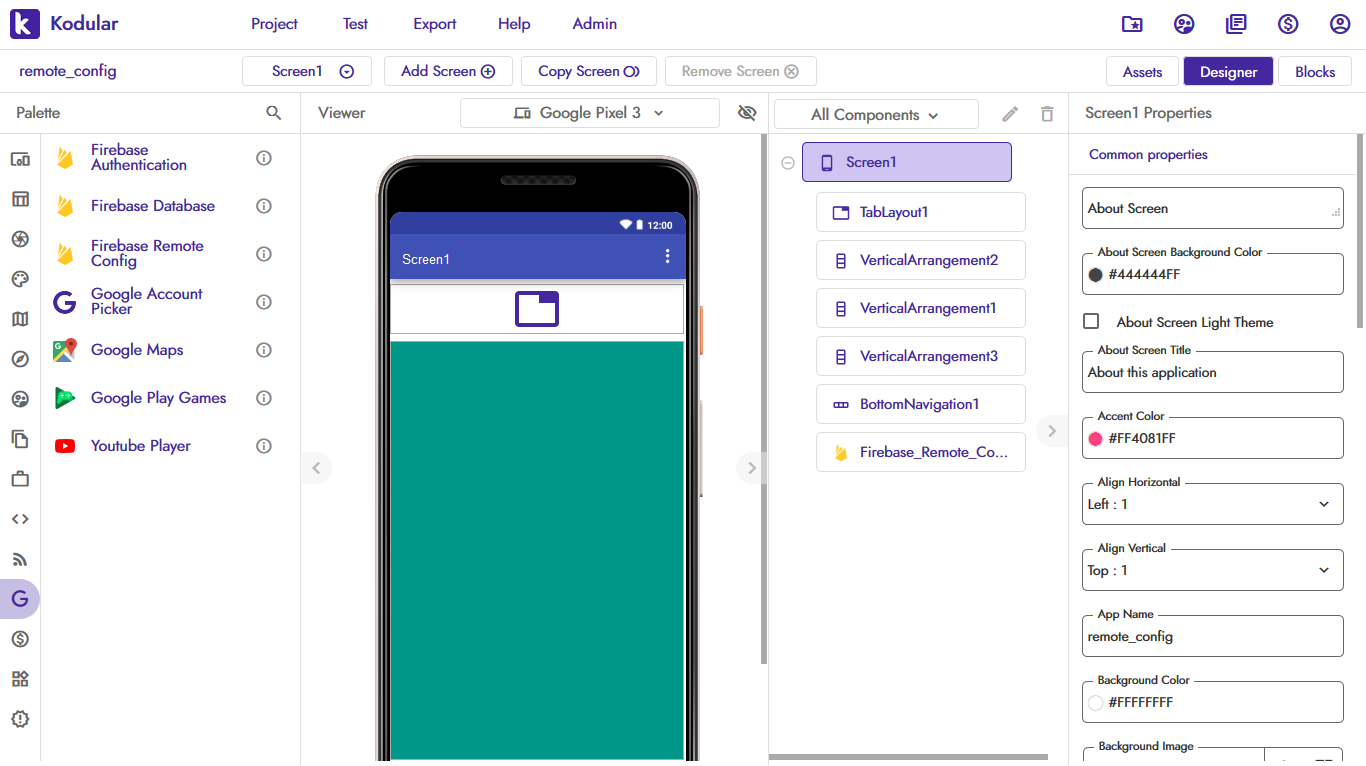
As usual, we'll start with a new project. Drag and drop the Tab Layout, Bottom Navigation, and Firebase Remote Config components. Also add three Vertical Arrangement components to the Screen. They will function as the different "sub-views" of the app which can be accessed using the Tab Layout or Bottom Navigation.
Give each Vertical Arrangement a distinct background color, and set their heights and widths to Fill Parent. Ensure only one arrangement is visible at a time, so set the Visible property of two arrangements to False.
Finally, set the Visible property of the Bottom Navigation component to False. By default, users will navigate your app using the tab layout. We change this behavior for the random testers group from the Blocks Editor.
Warning
You will have to upload the `google-services.json` file to Assets to be able to export your app. This file can be obtained from your Firebase Console.
This is what your designer should look like
Coding the blocks
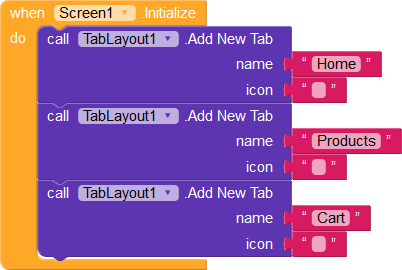
We first create all the tabs when the screen initializes. In this guide, we have three tabs: Home, Products, and Cart.
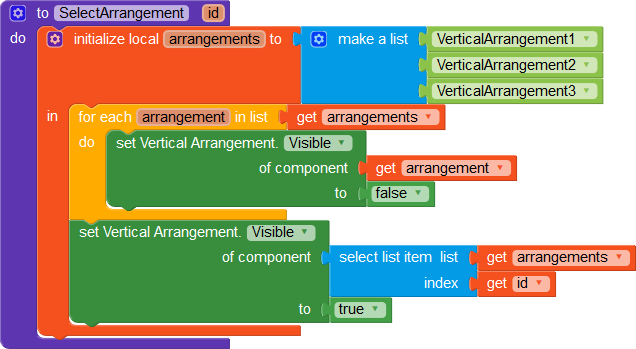
Next, we handle "selections" on the tabs using a procedure which takes the id of the tab as an input. We loop through all the vertical arrangements and set their Visible property to False. Then, we get the selected tab item and its corresponding arrangement, and set its Visible property to True. Generic blocks make it easier to manipulate the visibility of the components, especially in apps with several tabs.
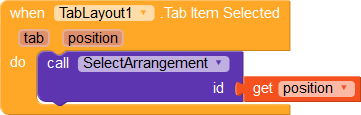
We call this procedure from the Tab Layout component's Tab Item Selected event.
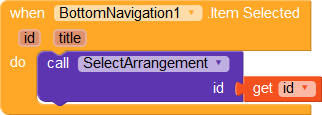
We do the same for the Bottom Navigation component: first add the menu items (in the Screen's Initialize event), and then handle the selection event.
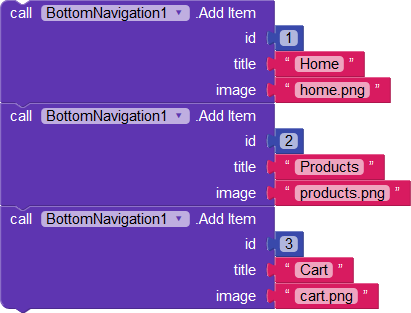
Info
The icon assets for the navigation items are provided in the AIA in the [Downloads](#downloads) section.
We can use the same prodcedure we made for the Tab Layout.
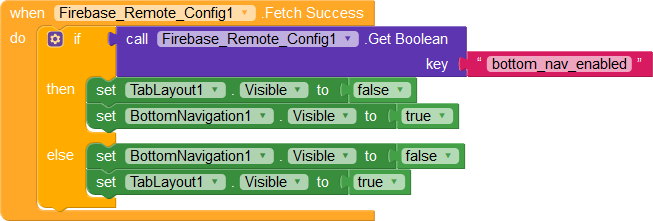
Now for the important bit. We use the Firebase Remote Config component to get the visibility status of the Bottom Navigation component. Before we use any of the parameters, we need to fetch all data from Firebase.
Place the fetch block in the Screen's Initialize event to do so.

Once the data has been fetched, we get the value of the bottom_navigation_enabled parameter. Since this is a boolean parameter, we use the Get Boolean block to retrieve the value.
This value can be either True or False, depending on the status of the user. If the user is in the randomly chosen 20% (our random_testers_group), then True is returned, False otherwise.
If the value is True, we show the Bottom Navigation instead of the Tab Layout.
Note
Updates to parameters can take a few hours to update across all devices, so don't be alarmed if you don't see all changes immediately.
Conclusion
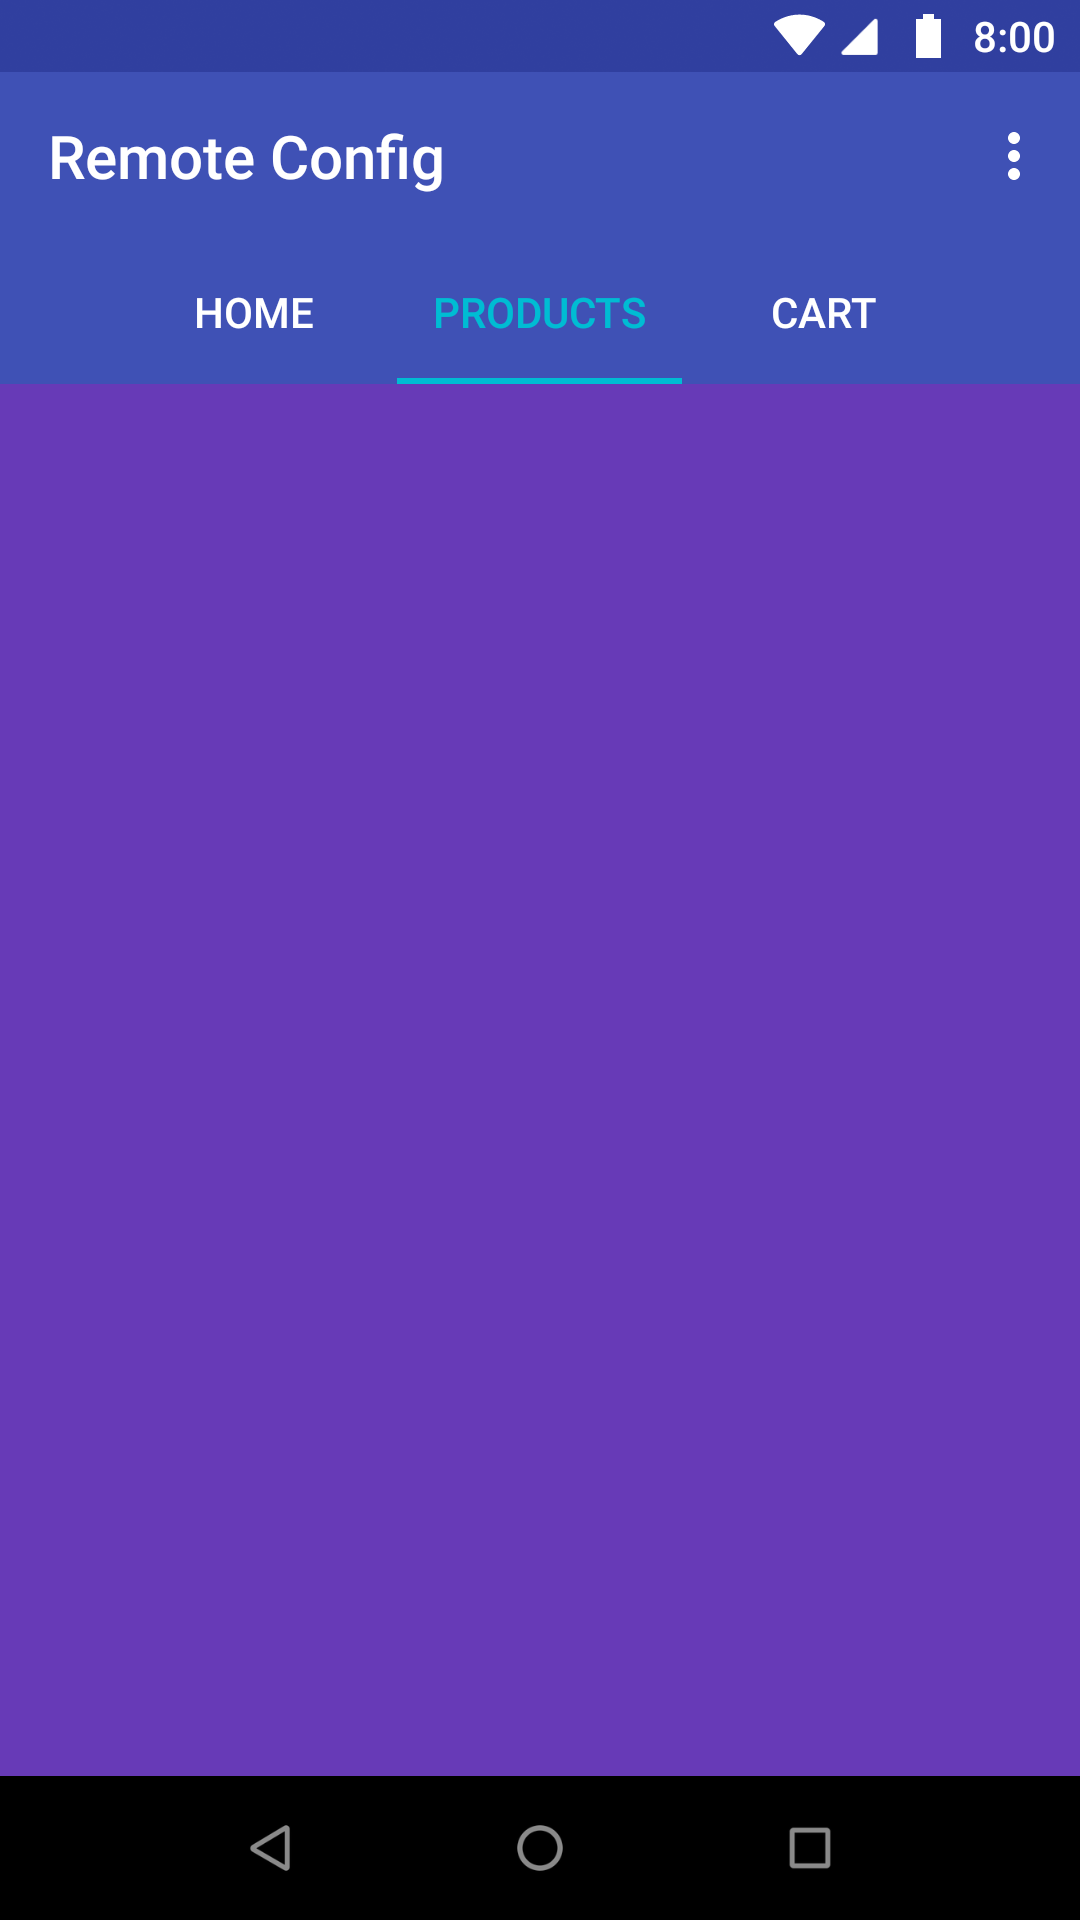
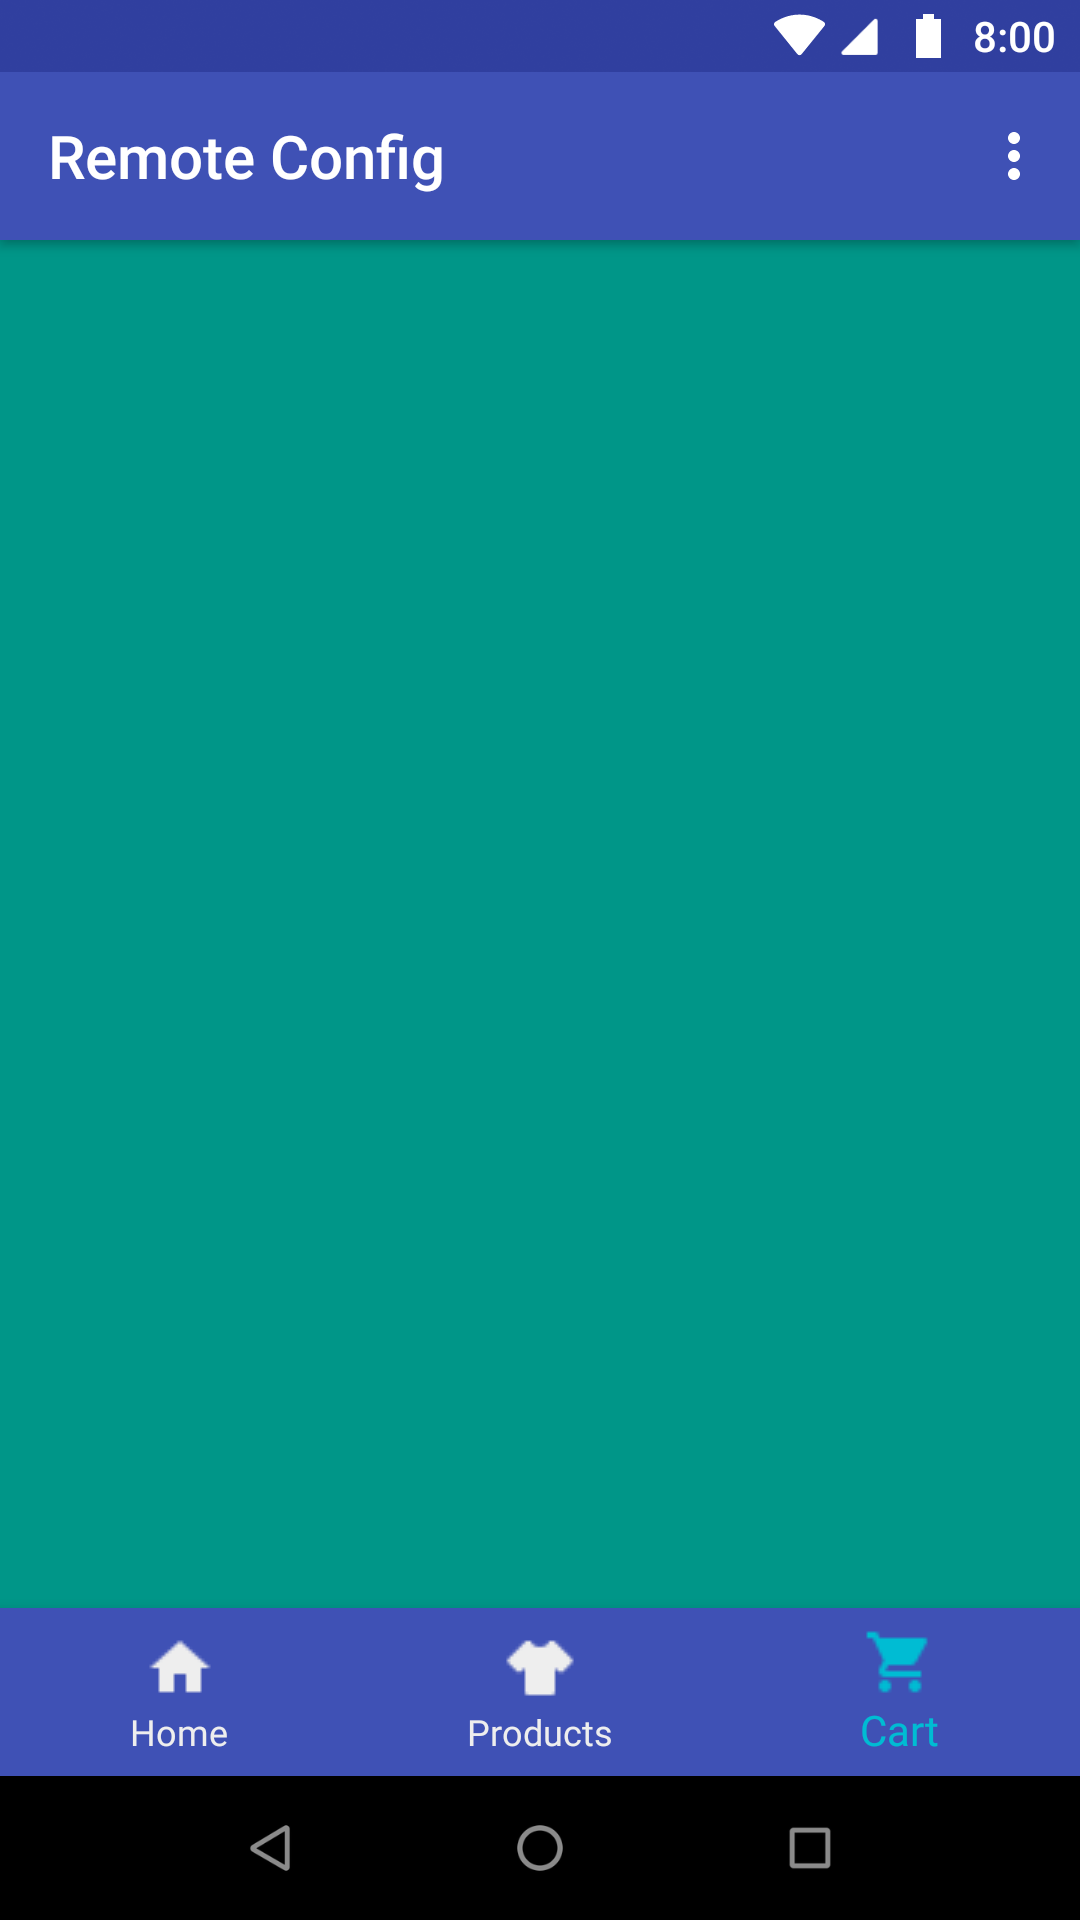
What a regular user sees (left) vs what a randomly chosen beta tester sees (right)
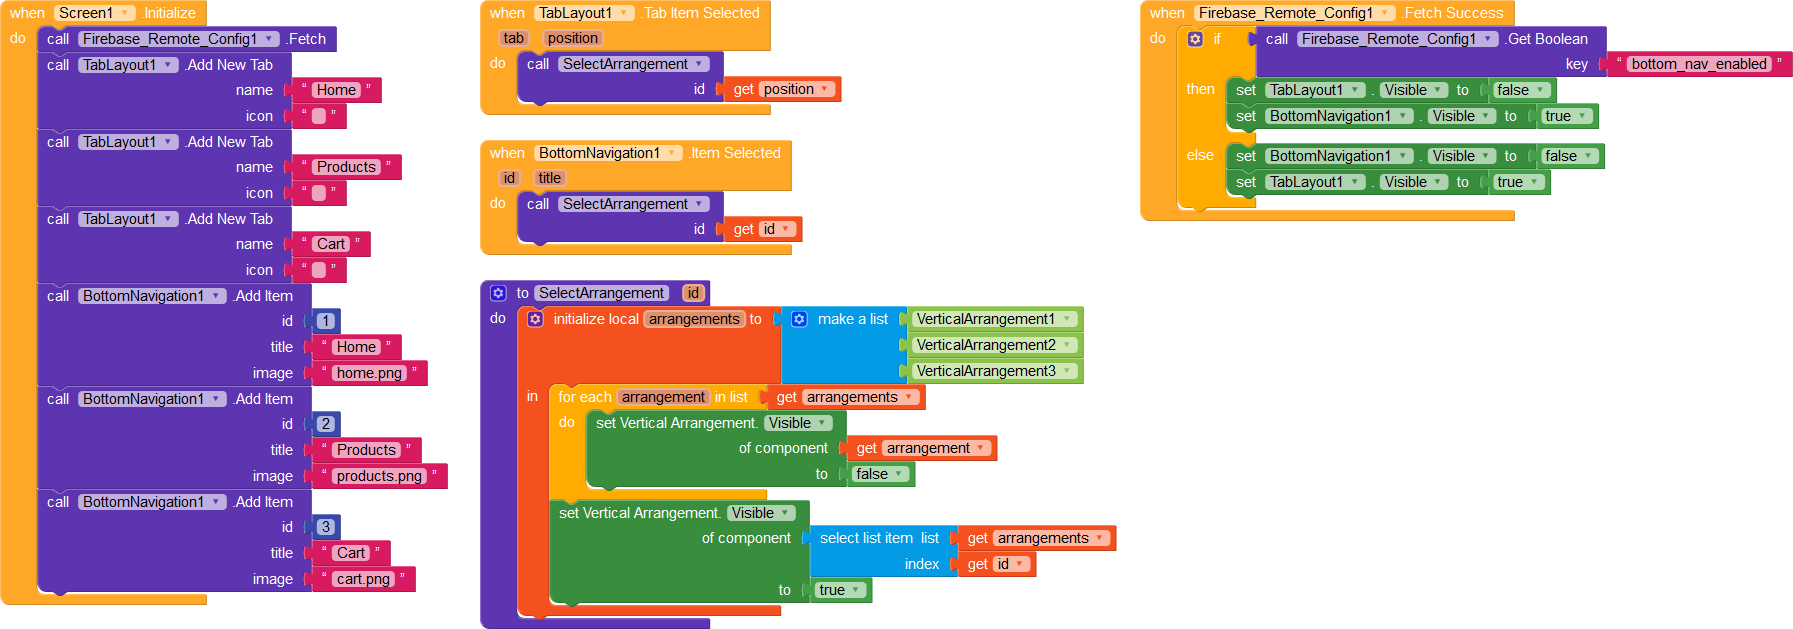
All the blocks we've used in this guide
Releasing the update to everyone
To release the changes to all your users, simply go to your Firebase Console and remove the condition from the parameter so that it always returns true.
Setting the parameter to true by default
Rolling back updates
To roll back the update you've made, remove the condition from the parameter and set the default value to false. This ensures nobody sees the Bottom Navigation anymore.

Removing the condition so that the parameter always returns false
Congratulations! You've successfully learnt to stage your app updates and release features to select users!
Here is a summary of what you've learned in this guide.
- How to set up Remote Config in Firebase.
- How to show features only to a few users.
- How to create a simple screen with a Tab Layout and a Bottom Navigation.
- How to fetch the Remote Config parameters.
- How to use the fetched data to change the layout of your app during runtime.
Next steps
Want ideas for making this app better? We have some things for you to try.
- Add more constraints to your condition. For example, show the
Bottom Navigationto 20% of your users from the USA. - Create more parameters and values.
- Add language based constraints. For instance, show a link to a German-English dictionary in your app if the user is from Germany.
- Roll back features and release them to all your users.
- Add a feedback form to your app so that users can share their thoughts on the
Bottom Navigation. Ensure that the feedback form is shown only to users who see theBottom Navigation!